DIY: Shibori Papers
Translation missing: en.blogs.article.author_on_date_html
Living
DIY: Shibori Papers
February 16, 2016
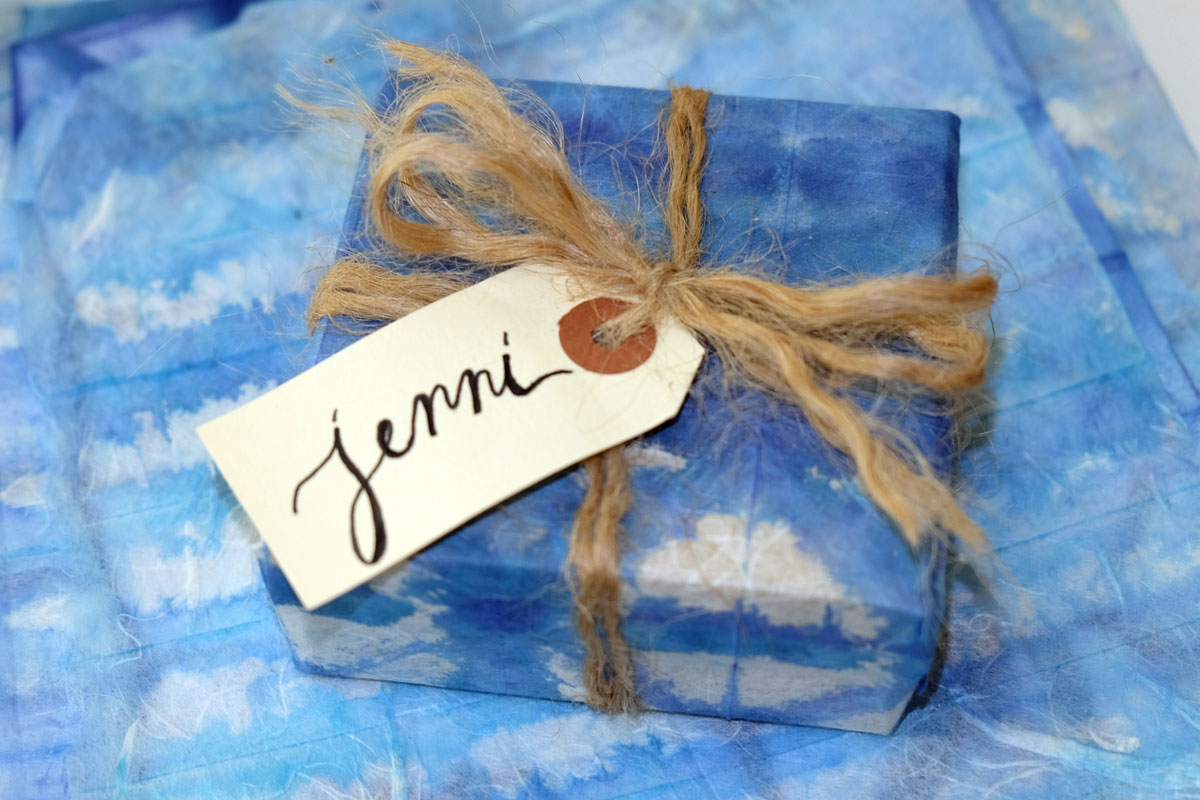
Lately, I have found myself obsessed with all things indigo – for apparel, home and everything in between, I can’t get enough of this beautiful hue. With this in mind, I wanted to share some easy-to-follow instructions for creating handmade Shibori papers.
An ancient Japanese dyeing technique that typically involves folding, twisting or bunching paper or cloth, then dyeing it in indigo, Shibori results in the most perfectly imperfect patterns and effects. There are so many ways in which this beautiful technique can be used, but some of my favorites are in creating unique cards, envelopes, and giftwrap. Here are some easy instructions for applying two different variations of the technique, as well as all the supplies you’ll need to do it yourself. I hope you enjoy. XXJKE
Materials
– Two varying shades of indigo colorblock pigment inks (one light and one dark)
– Rubber gloves
– Spray bottle with water
– Wastebasket
Accordion Dip-Dye Technique
1. Take one sheet of Gampi Smooth Cream Paper and create an accordion fold, making folds approximately 1″ apart.
2. Blot the edge of your folds on one of your inks pads. Flip and repeat on the opposite side. (To make easier, fold the paper gently and bring the two ends together between your fingers as you blot.)
3. Over a wastebasket, spritz a few times with water so that the ink bleeds slightly, making sure not to over-saturate.
4. Repeat steps 2-3, this time using your other ink color, and spritz again.
5. Unfold the paper and allow to dry.
Triangle Dip-Dye Technique
1. Take one sheet of Gampi Smooth Cream Paper and create an accordion fold, making folds approximately 1″ apart.
2. Fold bottom of paper up to create a square shape, (approx 1″ squared) and crease along the fold.
3. Create a triangle shape by bringing the top right corner of your “square” to the bottom left of your square and crease along that fold.
4. Continue flipping your paper in this manner and repeating along the same folds to create the triangle shape until you reach the end.
5. Blot all three edges of your triangle on one of your ink pads.
6. Over a wastebasket, spritz with water several times so that the ink bleeds slightly, making sure not to over-saturate.
7. Repeat step five with your other ink color, and spritz again.
For additional ink coverage, unfold the triangle fold but keep the accordion fold intact and reverse the direction of your folds. Follow by repeating steps 5 – 7.
8. Unfold the paper and allow to dry.